Start is always the very first Action in the Primary Flow of a Campaign. This Action contains the general configuration settings of the campaign which dictate its overall behavior and manages the prospects that enter it.
A campaign cannot be Saved or Started until you configure the Start Action.
To configure the Start Action:
- Double-click the Start Action to open the configuration window.
- Complete the following:
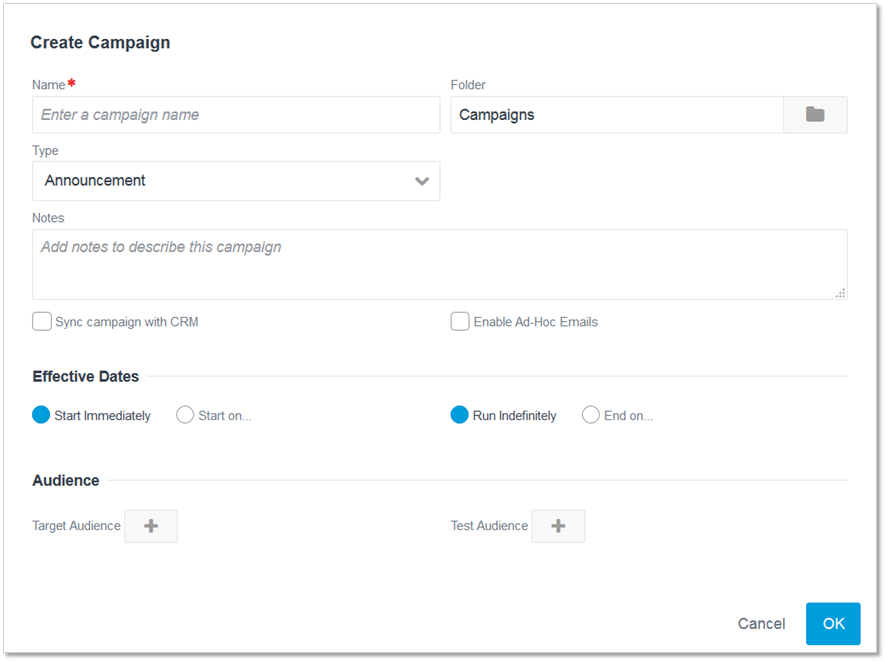
- Name: Provide the name of the campaign
- Folder: Choose the folder where you would like your campaign to be saved.
- Type: Use the drop-down menu to select the type for this campaign. The Campaign Type is used for reference and reporting purposes. It has no effect on the behavior of the Campaign.
- Notes (Optional): You may provide an optional note or description about the campaign for your future reference.
- Sync campaign with CRM (CRM integrated accounts only): Check this box if you would like to share this campaign with your CRM. As 'In CRM' campaign members interact with the campaign (i.e. click on eTrigue trackable links within emails sent from the campaign), they will be reported and associated as Campaign Members within the CRM.
- Enable Ad-Hoc Emails (Optional): Applies to SalesPro Clients Only. Checking this box adds a Ad Hoc Flow to the Campaign which allows you to make certain email templates available for use with SalesPro users in the CRM.
- Effective Dates
- Start Immediately: Choose this option if you would like the campaign to start running immediately after the start button has been clicked.
- Start on...: Choose this option if you would like the campaign to start running on a certain date and time after the 'Start' button has been clicked.
- Run Indefinitely: Choose this option if you would like the campaign to run until a user manually clicks the 'End' button.
- End on...: Choose this option if you would like the campaign to end on a certain date and time after the campaign has started.
- Start Immediately: Choose this option if you would like the campaign to start running immediately after the start button has been clicked.
- Audience: Click the
 icon to choose the List(s) of prospects that you would like to include in the campaign.
 - Test Audience (Recommended): Click the icon to select the Static List that you would like to use while testing your campaign actions.
3. Click OK to retain your changes.